> ## Documentation Index
> Fetch the complete documentation index at: https://docs.chief.bot/llms.txt
> Use this file to discover all available pages before exploring further.
# Creating your first Action
> An Action runs a prompt for you automatically — on a schedule, or whenever new data lands in its scope — and delivers the result.
 An [**Action**](/help/actions-automation/what-are-actions) runs a prompt for you automatically — on a schedule, or whenever new data lands in its scope — and delivers the result. Here's the full walkthrough, step by step.
ℹ️ **Good to Know:** The Actions tab only appears inside [a Project](/help/projects-sharing-teams/what-is-a-project). Open your Project, then click **Actions** in the left nav.
### 1. Click Create Action
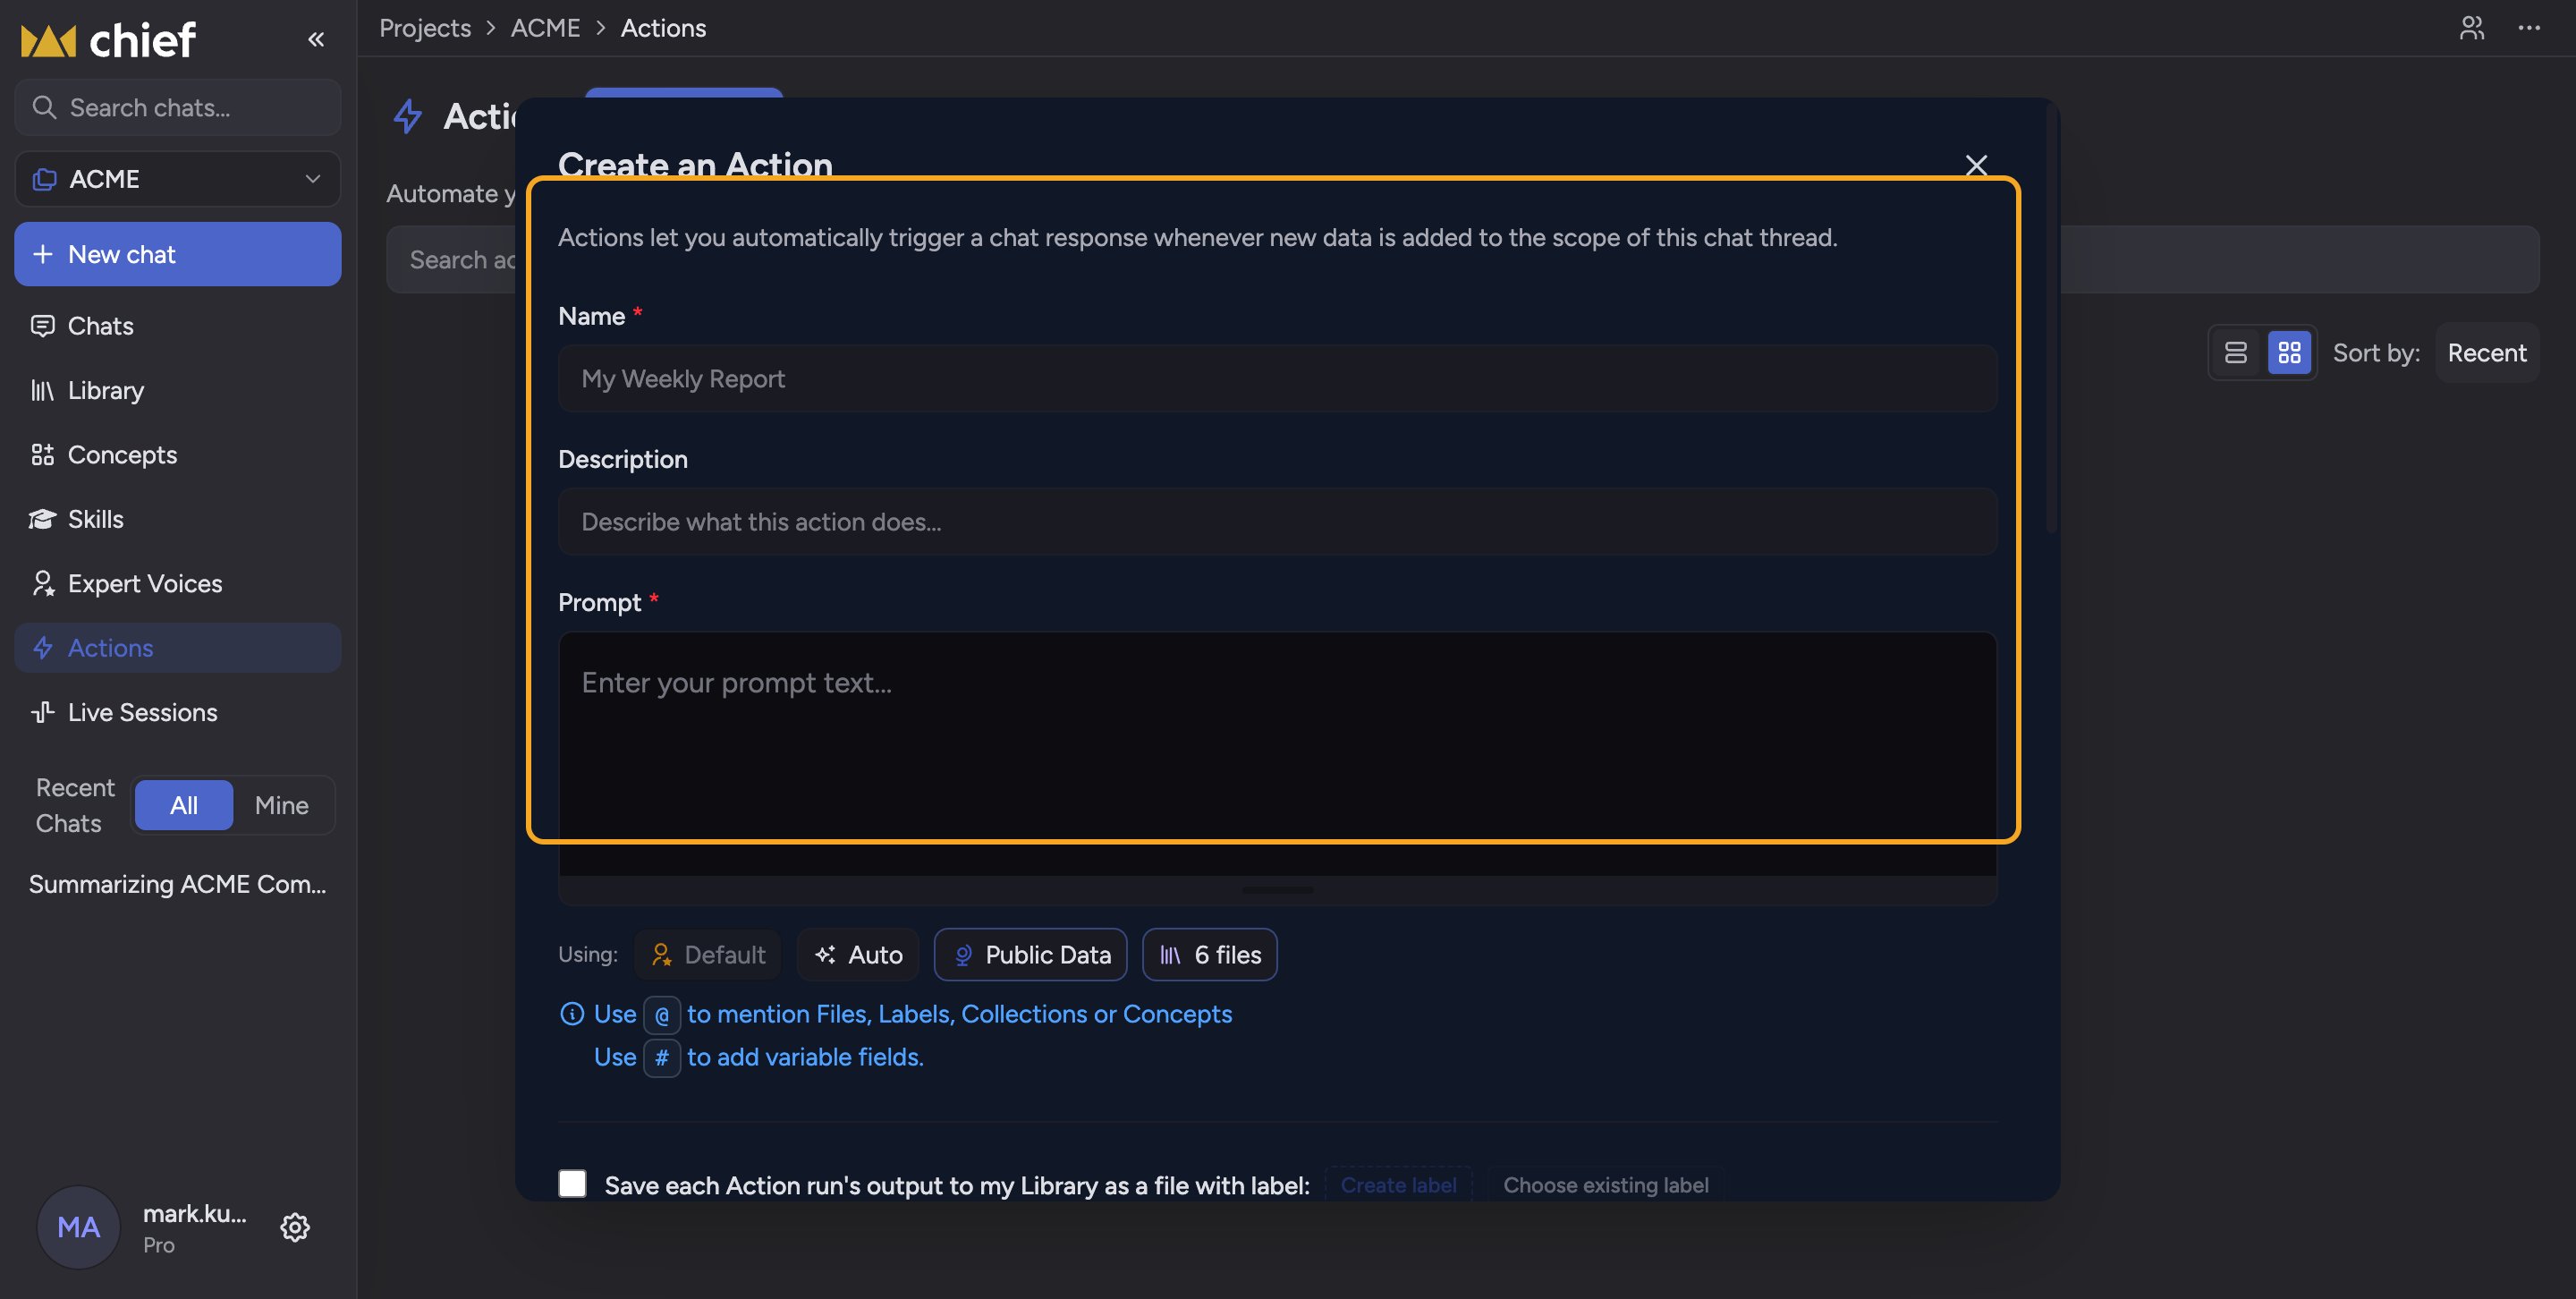
On the **Actions** page, click **Create Action** (top-left, beside the page title). The **Create an Action** dialog opens.
### 2. Name your Action
In the **Name** field, give it a name you'll recognize in your Actions list — for example, "Weekly competitor digest".
### 3. Write the prompt
In the **Prompt** box, type what you want Chief to do on each run, exactly as you'd ask in a chat. Use [**@** to mention Files, Labels, Collections or Concepts](/help/the-prompt-bar-scope/mentioning-files-labels-collections-concepts), and [**#** to add variable fields](/help/the-prompt-bar-scope/using-variable-fields-in-a-prompt).
### 4. Set what Chief works with
Use the **Using:** row to [set the scope](/help/the-prompt-bar-scope/setting-the-scope-of-a-chat-using-files-labels-collections-concepts) — the Expert Voice, intelligence level, Public Data, and which Files the Action reads each run.
### 5. Choose a trigger type
Under [**Trigger Type**](/help/actions-automation/triggers-on-a-schedule-vs-on-new-data), pick **On a schedule** (run at set times) or **Whenever there is new source data** (run when new content is added to the scope).
### 6. Set the schedule
If you chose **On a schedule**, [set the time and days](/help/actions-automation/scheduling-actions-days-dates-times) in the **Run at … on …** row.
### 7. Save each run to your Library (optional)
Tick [**Save each Action run's output to my Library as a file with label**](/help/actions-automation/saving-action-output-to-your-library) to keep every result as a File you can search, label, and reuse.
### 8. Choose what runs without asking
Under [**Run without asking**](/help/actions-automation/auto-approving-actions-granting-permissions), decide which connected tools (Gmail, Google Calendar) the Action may use automatically. Leave a toggle off and Chief will ask you to confirm each time.
### 9. Create the Action
Click **Create Action** at the bottom of the dialog to save it.
### Your Action is live
It now appears on the **Actions** page. Hover the card for [**Run Now**](/help/actions-automation/viewing-run-history-running-manually), and [**Pause**, **Duplicate**, and **Delete**](/help/actions-automation/pausing-resuming-deleting-actions).
## FAQ
Actions live inside a Project. Open a Project first — the **Actions** item appears in the left nav.
Yes. On the Actions page, hover the card and use **Edit** (or open **View Details**) to change the prompt, trigger, schedule, or delivery.
An [**Action**](/help/actions-automation/what-are-actions) runs a prompt for you automatically — on a schedule, or whenever new data lands in its scope — and delivers the result. Here's the full walkthrough, step by step.
ℹ️ **Good to Know:** The Actions tab only appears inside [a Project](/help/projects-sharing-teams/what-is-a-project). Open your Project, then click **Actions** in the left nav.
### 1. Click Create Action
On the **Actions** page, click **Create Action** (top-left, beside the page title). The **Create an Action** dialog opens.
### 2. Name your Action
In the **Name** field, give it a name you'll recognize in your Actions list — for example, "Weekly competitor digest".
### 3. Write the prompt
In the **Prompt** box, type what you want Chief to do on each run, exactly as you'd ask in a chat. Use [**@** to mention Files, Labels, Collections or Concepts](/help/the-prompt-bar-scope/mentioning-files-labels-collections-concepts), and [**#** to add variable fields](/help/the-prompt-bar-scope/using-variable-fields-in-a-prompt).
### 4. Set what Chief works with
Use the **Using:** row to [set the scope](/help/the-prompt-bar-scope/setting-the-scope-of-a-chat-using-files-labels-collections-concepts) — the Expert Voice, intelligence level, Public Data, and which Files the Action reads each run.
### 5. Choose a trigger type
Under [**Trigger Type**](/help/actions-automation/triggers-on-a-schedule-vs-on-new-data), pick **On a schedule** (run at set times) or **Whenever there is new source data** (run when new content is added to the scope).
### 6. Set the schedule
If you chose **On a schedule**, [set the time and days](/help/actions-automation/scheduling-actions-days-dates-times) in the **Run at … on …** row.
### 7. Save each run to your Library (optional)
Tick [**Save each Action run's output to my Library as a file with label**](/help/actions-automation/saving-action-output-to-your-library) to keep every result as a File you can search, label, and reuse.
### 8. Choose what runs without asking
Under [**Run without asking**](/help/actions-automation/auto-approving-actions-granting-permissions), decide which connected tools (Gmail, Google Calendar) the Action may use automatically. Leave a toggle off and Chief will ask you to confirm each time.
### 9. Create the Action
Click **Create Action** at the bottom of the dialog to save it.
### Your Action is live
It now appears on the **Actions** page. Hover the card for [**Run Now**](/help/actions-automation/viewing-run-history-running-manually), and [**Pause**, **Duplicate**, and **Delete**](/help/actions-automation/pausing-resuming-deleting-actions).
## FAQ
Actions live inside a Project. Open a Project first — the **Actions** item appears in the left nav.
Yes. On the Actions page, hover the card and use **Edit** (or open **View Details**) to change the prompt, trigger, schedule, or delivery.