

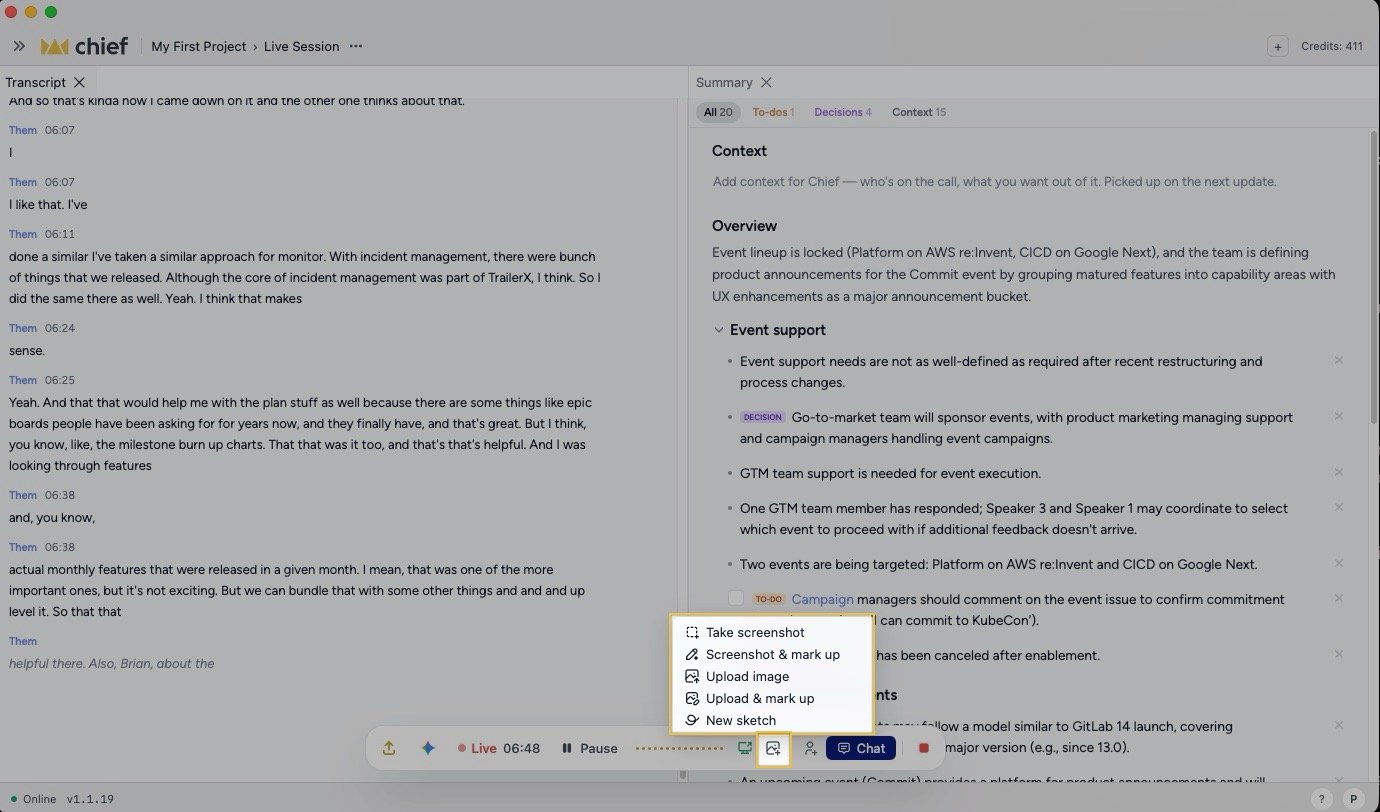
Take a screenshot
- Start a Live Session in the Chief Live Sessions App.
- Click the Add a screenshot, image, or sketch to the transcript image button in the session controls.
- Click Take screenshot.
- Use the macOS screenshot tool to select what you want to capture.
Mark up a screenshot or image
Choose Screenshot & mark up to capture your screen and open the visual editor before adding it. Choose Upload & mark up to annotate an existing image instead. Add your marks, then save the result to the transcript. You can also choose New sketch when you want to explain an idea on a blank canvas instead of capturing your screen.Upload, paste, or drag an image
Use any of these paths during the session:- Click the image button, then click Upload image and choose one or more files.
- Copy an image, click inside the Transcript panel, and press Cmd-V to paste it directly.
- Drag image files onto the Transcript panel and drop them when Drop image to add it here appears.
Remove an image
Find the image in the transcript and click its remove control before the Live Session ends. If Chief cannot remove it, the app shows Could not remove the image from the session. Please try again.FAQ
Why can't I paste an image into a finished transcript?
Why can't I paste an image into a finished transcript?
Images can only be added during an active Live Session. Start a new session if you need to capture more visual context, or upload an existing transcript if your source is transcript text rather than an image.
Why did Chief reject my image?
Why did Chief reject my image?
Confirm the file is a PNG, JPEG, WebP, or GIF and no larger than 10 MB. Other formats show Only PNG, JPEG, WebP, and GIF images can be added to the transcript.
Where does a pasted image appear?
Where does a pasted image appear?
Chief anchors it at the current transcript tail, after the latest finalized passage. Adding an image also returns the transcript to the newest content if you had scrolled upward.