

Stay in control of Action emails
Once an Action emails its results, you can manage who’s on the list and whether each person is still subscribed — all from the Action’s editor.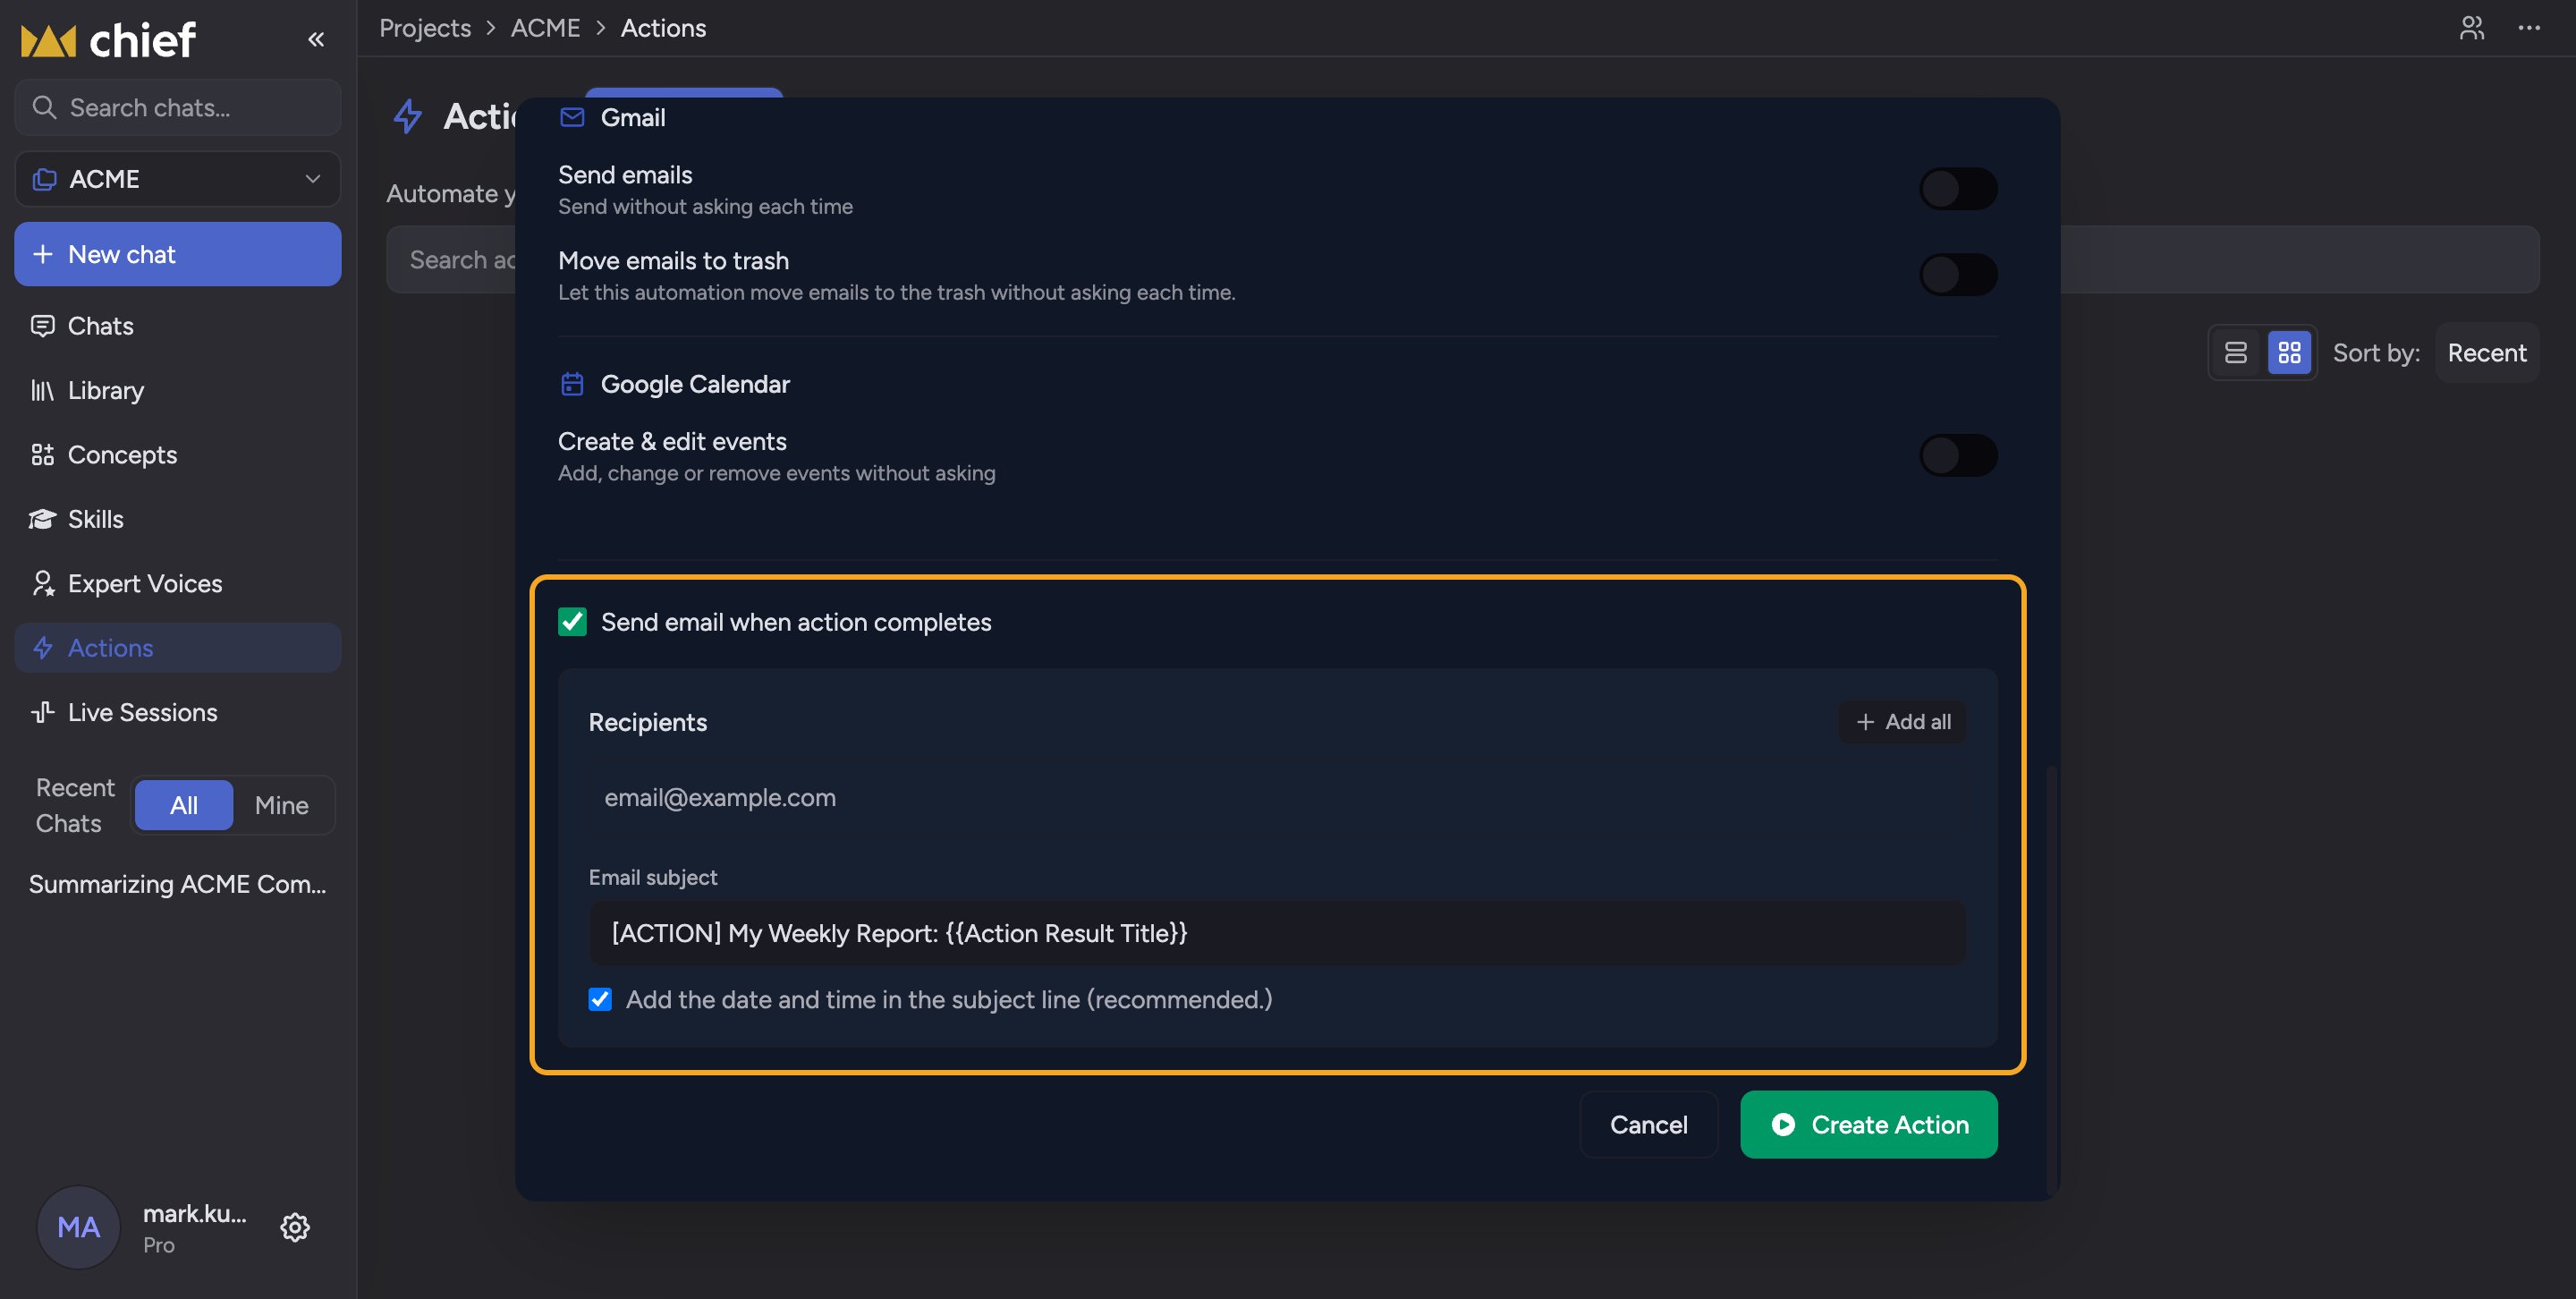
Add, remove, and bulk-edit recipients
Open the Action and find the email settings under Send email when action completes. In the Recipients box you can type addresses, use Add all to add everyone in the Project, or Remove all to clear the list (up to 10 recipients).Check subscription status
When editing an Action that already has recipients, a Recipient status list appears. Each address is marked Subscribed (green dot) or Unsubscribed (amber warning). Unsubscribed recipients won’t get the emails even though they’re on the list.Resubscribe yourself
If your own address shows Unsubscribed, click the Resubscribe link next to it to start receiving the Action’s emails again.ℹ️ Good to know: People unsubscribe using the link in the Action’s emails. That’s why an address can stay in the recipients list yet still show as Unsubscribed — they opted out on their end.
FAQ
I added someone but they aren't getting emails — why?
I added someone but they aren't getting emails — why?
Check their Recipient status. If it reads Unsubscribed, they previously opted out and must resubscribe themselves. Being in the list isn’t enough.
How do I stop receiving an Action's emails?
How do I stop receiving an Action's emails?
Remove your address from the recipients in the Action’s editor, or use the unsubscribe link in one of its emails.
Why don't I see Recipient status?
Why don't I see Recipient status?
It only shows when editing an existing Action that already has at least one recipient — not while creating a brand-new Action.