

Create a new Project
Use a new Project whenever you want to separate a body of work or collaborate with a specific group.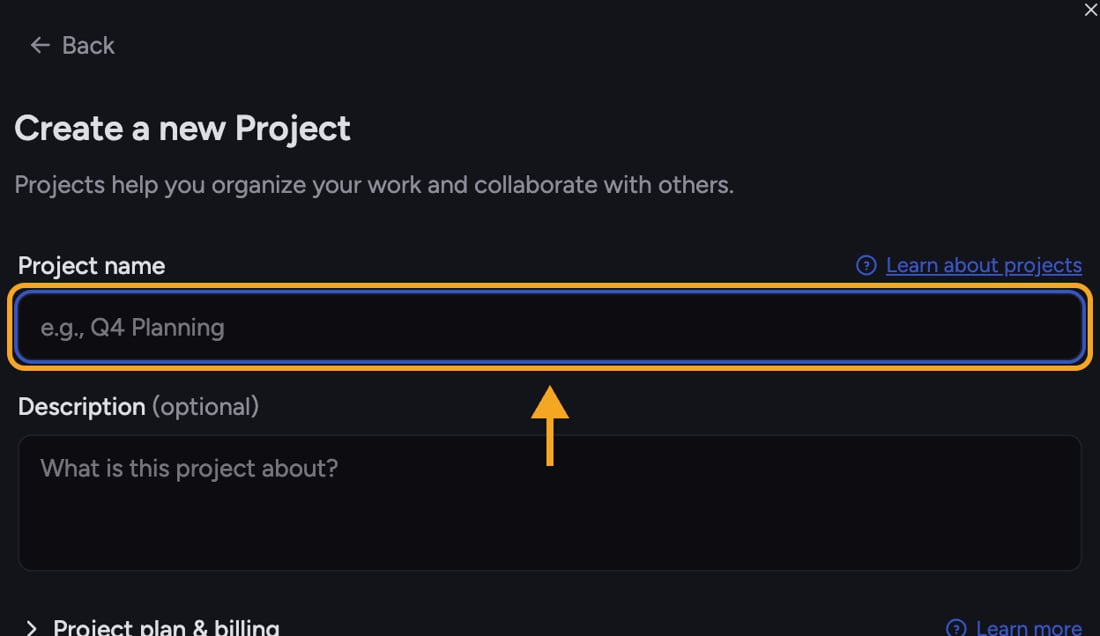
- At the top of the app, click the project name to open the Switch Projects picker.
- Click New Project. The Create a new Project form appears.
- If the Organization field appears, choose where the Project should live. You can create a Project only in an Organization where you are an Owner. If your current Organization is unavailable because you do not own it, Chief selects one of your own Organizations instead. Check this field before continuing.
- In the Project name field, type a name (for example, “Q3 Campaign”). This field is required.
- Optional: in the Description field, add a short note about what the Project is for.
- Click the Create project button. Chief creates the Project and switches you into it.
Set the plan & billing
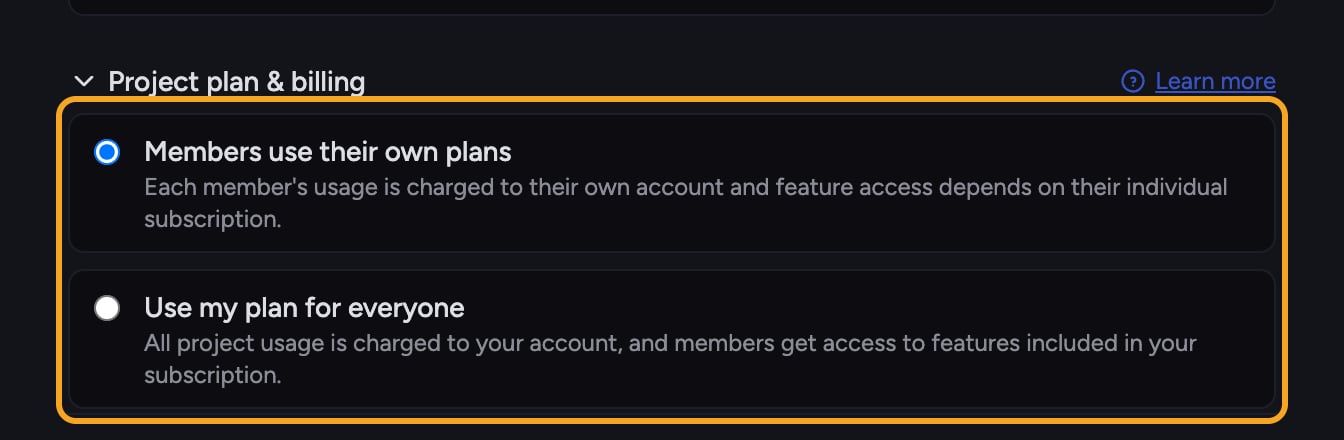
- Members use their own plans (the default) — each member’s usage is charged to their own account, and feature access depends on their individual subscription.
- Use my plan for everyone — all Project usage is charged to your account, and members get access to the features included in your subscription.
Rename or edit a Project later

From the sidebar
- In the sidebar, open the Projects dropdown.
- Select Edit Project name. The Edit this Project dialog opens.
- Update the Project name and/or Description fields.
- Click Save.
From the Project homepage
- Open the Project’s homepage.
- Hover over the Project name and click the Edit pencil.
- Update the Project name and/or description inline.
- Click Save. To leave the existing details unchanged, click Cancel.
ℹ️ Good to Know: If you continue without saving homepage edits, Chief may show an Unsaved changes dialog: “Save your project name and description before continuing, or your edits will be lost.” Choose Save, Don’t save, or Cancel. Other Project actions live in the sidebar’s Projects dropdown; the Project picker is for switching, searching, and creating Projects.
Frequently asked questions
Can I change the billing option after creating the Project?
Can I change the billing option after creating the Project?
The plan and billing choice is made when you create the Project. See Choosing which plan funds a project for how the two options behave and what to do if you need to change funding later.
I clicked New Project but got a sign-up screen instead of the form.
I clicked New Project but got a sign-up screen instead of the form.
Creating a Project requires an account. Finish signing up and Chief will return you to the create form.
Why does the form say an Organization "is not available: you do not own it"?
Why does the form say an Organization "is not available: you do not own it"?
You are currently viewing an Organization where you can access a Project but are not an Organization Owner. Creating a Project requires Organization ownership, so Chief selects an Organization you own instead. Check the Organization field and choose from the available options before creating the Project.